How to prime, paint, and finish Armorite® Exterior MDF on your next project
Jump to a section
Finishing Guidelines (English)
Looking for more?
Find additional Armorite® resources here.
Notes
- These guidelines cover the general installation recommendations for Armorite. Armorite should be installed using the same good building principles used in cabinetry and trim installation in accordance with local building codes, and the installation guidelines included below.
- Roseburg Forest Products accepts no liability or responsibility for the improper installation of this product.
- Armorite may not be suitable for every application and it is the sole responsibility of the installer to be sure that Armorite is fit for the intended use. Since all installations are unique, it is also the installer’s responsibility to determine specific requirements concerning each application.
Customer Support
- Roseburg Forest Products recommends that all applications be reviewed by a licensed architect, engineer and/or local building official before installation.
- If you have any questions or need further assistance, please contact Roseburg Forest Products Customer Service at (541) 784-4070 or get in touch via our Contact Us page.
Here are our tips on how to store, handle, cut, prime, and paint for long-lasting, beautiful results
Armorite is a medium density fiberboard panel product manufactured with a formaldehyde free resin and proprietary biocidal treatment process for rot and insect resistance. Armorite conforms to 2015, 2012, and 2009 International Building Code as well as 2015, 2012, and 2009 International Residential Code. Weather resistance, termite resistance, decay resistance, corrosion, and structural properties were evaluated.
Armorite is manufactured with Western softwoods for superior strength with less weight. The manufacturing process ensures easy nailing, machining, and finishing. Armorite is intended for use in common MDF applications like cabinetry, trim, and finish carpentry, but unlike standard MDF, is moisture, insect, and rot resistant. Armorite may be used in certain (above ground) exterior applications provided proper fastening and coating/finishing procedures are followed.
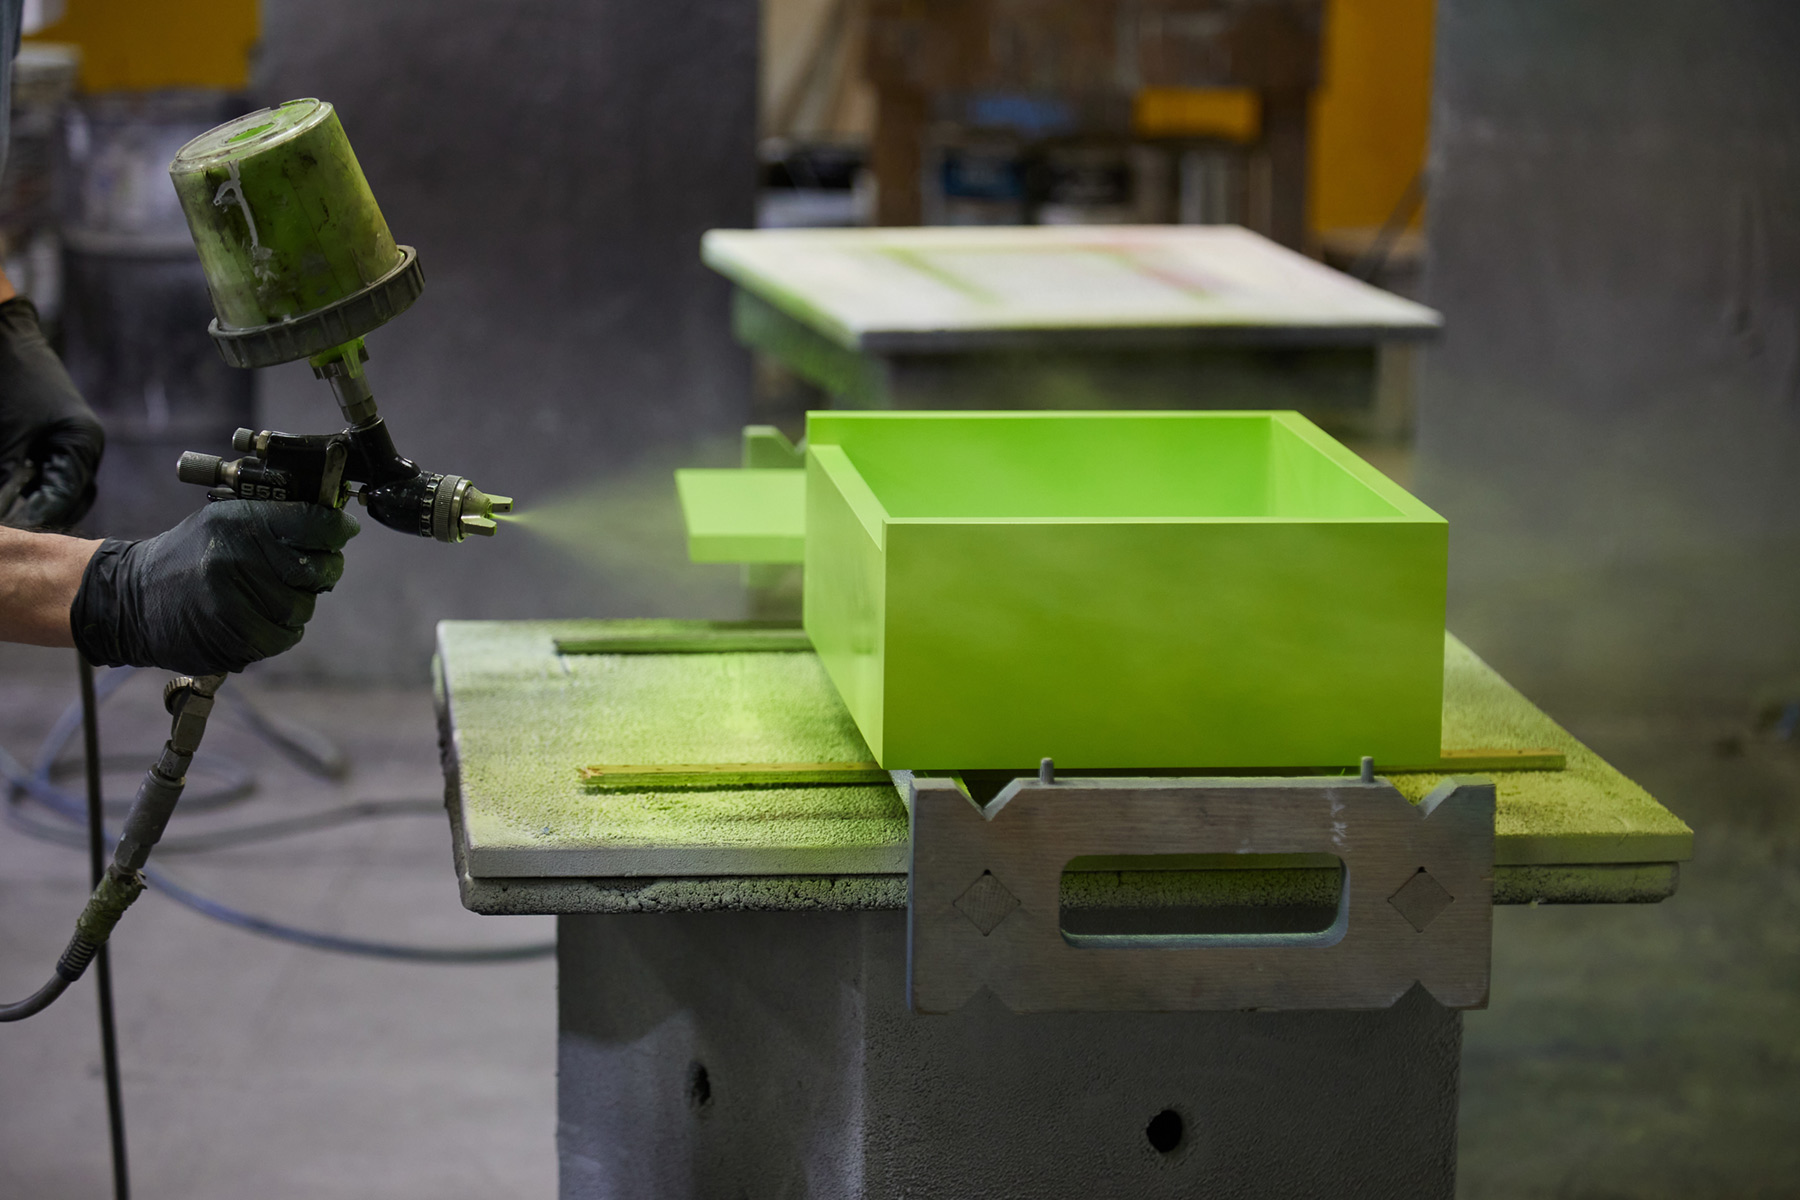
PRIMING AND PAINTING
Armorite requires exterior primer and paint for protection. Refer to your paint manufacturer representative or pre-finisher for color options and compatibility with Armorite.
Armorite surfaces must be clean, dry, and void of any foreign material such as dirt, oil, grease or other contaminates that may come from normal handling, storage and/or installation prior to painting.
Moisture cycling is a main reason for paint failure on wood. Since Armorite is a wood-based product, proper sealing of all surfaces is required for durable performance.
Prime Coat: Armorite will readily accept most exterior coatings formulated for application over wood and wood products. A minimum prime coat film thicknessof 1.5 mils (dry) is recommended for exterior applications.
Top Coat: Top coat should be applied after properly priming, caulking, and sealing all fasteners to achieve a dry film build of 2.5 to 3.0 mils, creating a total dry film build of 4.0 to 4.5 mils.
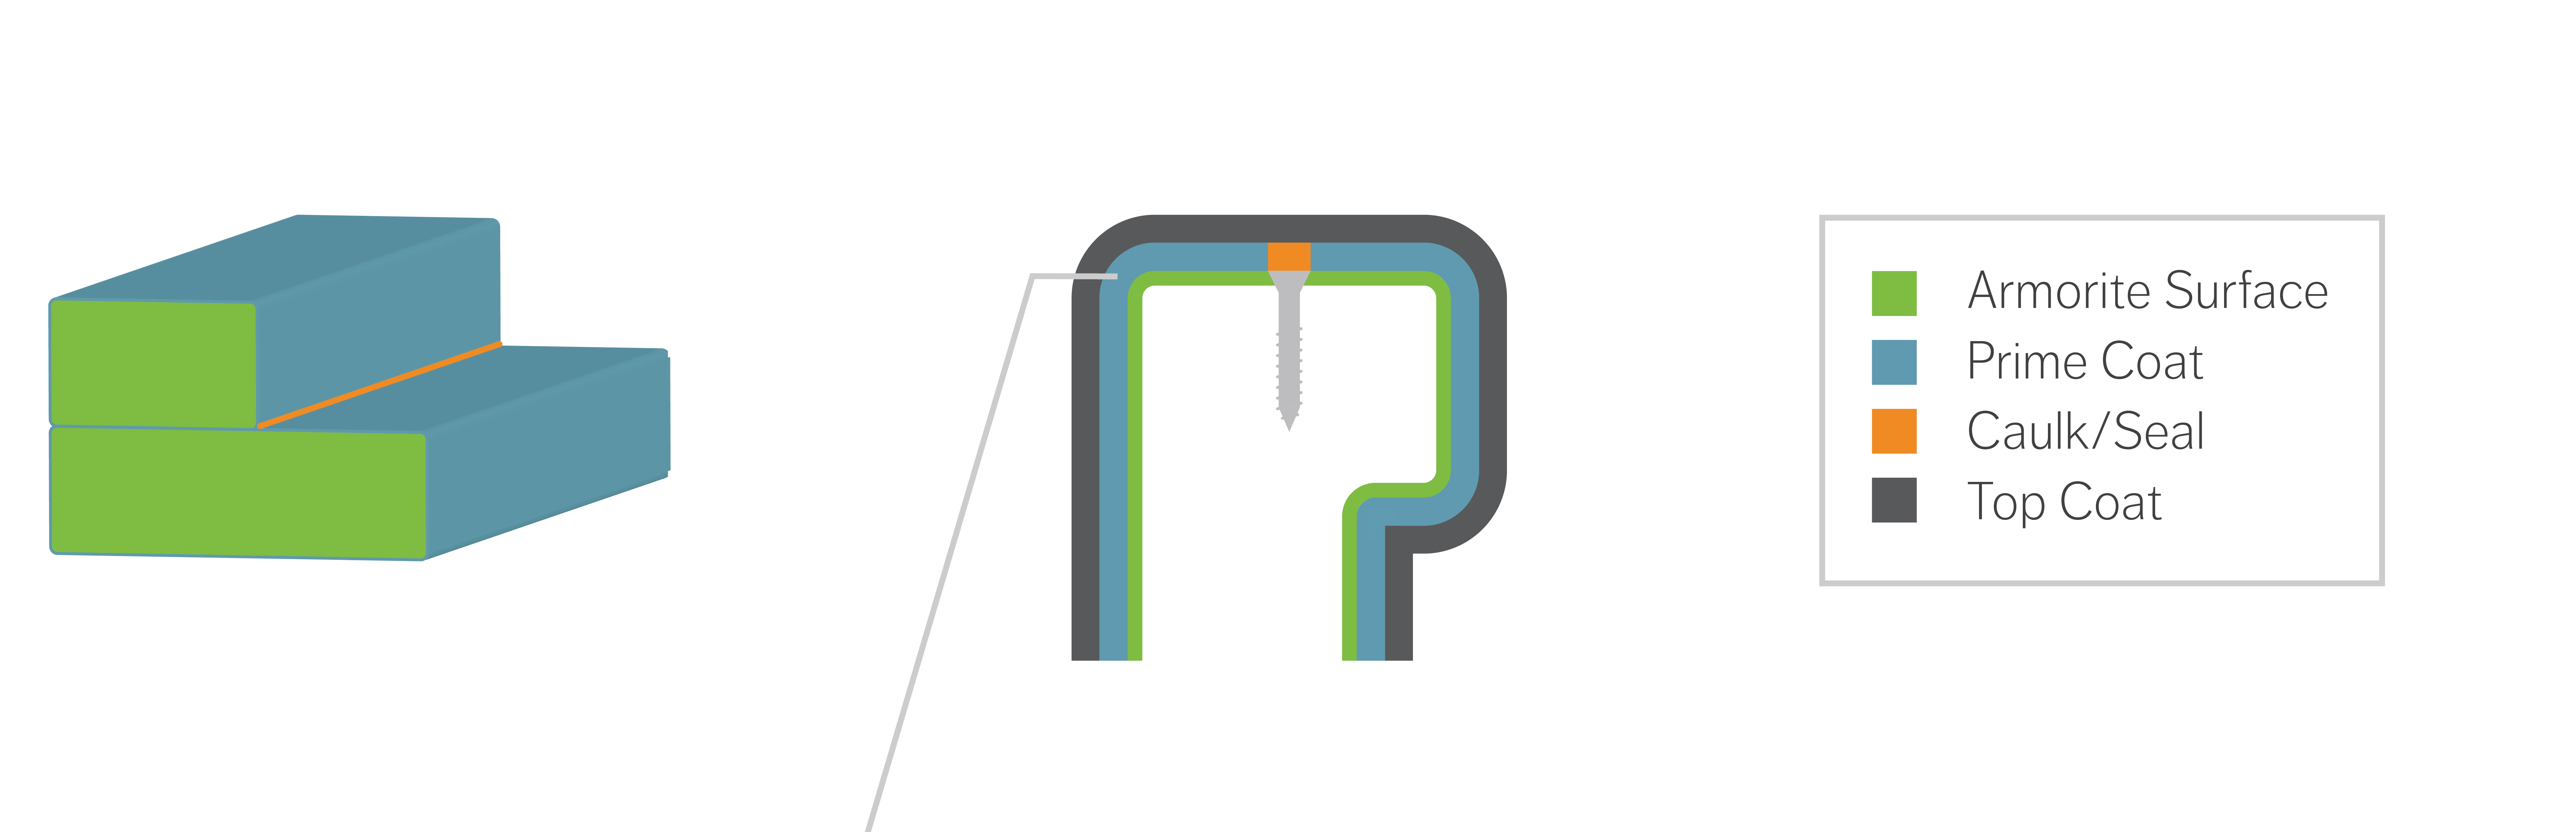
Reminder: All paints will draw away from a sharp edge or corner, regardless of what is being painted: metal, plastic, lumber, plywood and Armorite. Because the paint is very thin on this area, any expansion and contraction resulting from ambient changes will cause the paint to crack. Rounding edges and corners is highly recommended.
DISCLAIMER: Armorite’s Warranty does not cover the performance of painted finishes or coating applied to the Product by the original purchaser or any third party.
Armorite products must not be used in load bearing applications, but may be used in spanned applications such as fascias, soffits and ceilings. For optimal performance, Armorite should be installed over a solid backing.
Since all installations are unique, it is also the installer’s responsibility to determine specific requirements in regard to each application.
Roseburg recommends that all applications be reviewed by a licensed architect, engineer, and/or local building official before installation.

STORAGE & HANDLING
- Store Armorite indoors on a flat and level surface. Protect from weather and sunlight when not in use.
- Since Armorite is more flexible than natural wood, it may conform to uneven surfaces.
- Ensure that storage areas, as well as all framing and substructures, are flat and level to minimize uneven surfaces.
- Units of Armorite are shipped from the manufacturer with a protective covering.
- If covering has been removed, take care to keep product dry, free of dirt and debris at jobsite.
- If product becomes dirty, clean before installation.
- Environmental changes can cause minor expansion and contraction of any wood product. It is always best to acclimate material prior to coating and installation.

CARE & CLEANING
- Armorite can be cleaned with mild detergent and a medium nylon bristle brush.
- Other cleaning methods include using a soft cloth and a mixture of mild detergent.
- When using cleaners other than a mixture of mild detergent and water, it is best to test on a small area, or a scrap piece of Armorite, to make sure it does not harm the surface or damage the product’s appearance.
- Always read the cleaning product manufacturer’s specific information before using any product on your Armorite and follow their instructions.

CUTTING
- Armorite can be cut using the same tools used to cut lumber.
- Carbide tipped blades designed to cut wood work well. Avoid using fine tooth metal cutting blades.
- Rough edges from cutting may be caused by excessive friction, poor board support, or worn or improper tooling. Saw blades, router bits, drills bits; all must be new and sharp for best results.
- Always prime and topcoat cut ends prior to installation.
- Caulk all joints with high-quality exterior grade caulking.

DRILLING AND ROUTING
- Armorite products can be drilled using the same tools used to drill lumber.
- Drilling Armorite products is similar to drilling a hardwood. Care should be taken to avoid frictional heat build-up.
- Armorite products can be routed using standard router bits and the same tools used to rout lumber. Bits must be sharp and undamaged.
- Carbide tipped router bits are recommended.
- Routing Armorite products provides a crisp, clean edge.
- Pre-drilling is typically not required unless a large fastener is used or product is installed in low temperatures.
- Counter-sink holes so fastener head is flush and caulk around exposed fastener head.
- Armorite products expand and contract, like other wood-based panels, with changes in moisture content.
- Properly fastening Armorite material along its entire length will minimize expansion and contraction.
- To bond Armorite to other substrates, various adhesives may be used.